Custom Jango Fett

AmShak

Senior Moderator
Staff member
Below is the result of Jedi Daxter's request for a Cumstom Carded Jango Fett from the Bounty Hunter game. In exchange, Jedi Daxter will be hosting a giveaway for TBS forum members in the near future.

these are the images that i started with that were created in photoshop ....
 

Attachments

  • JangoFettFront1 copy.jpg
    JangoFettFront1 copy.jpg
    207.8 KB · Views: 380
  • JangoFettBack1 copy.jpg
    JangoFettBack1 copy.jpg
    444.3 KB · Views: 397
  • JangoFettInsert copy.jpg
    JangoFettInsert copy.jpg
    179.7 KB · Views: 371

AmShak

Senior Moderator
Staff member
here is the finished product .....
 

Attachments

  • 102204.jango1front.jpg
    102204.jango1front.jpg
    398.6 KB · Views: 434
  • 102204.jango1side1.jpg
    102204.jango1side1.jpg
    476.9 KB · Views: 360
  • 102204.jango1side2.jpg
    102204.jango1side2.jpg
    412.8 KB · Views: 357

AmShak

Senior Moderator
Staff member
with some slight alterations, some variations can be created ....
 

Attachments

  • 102204.jangopilot.jpg
    102204.jangopilot.jpg
    493.3 KB · Views: 378
  • 102204.jangofinalbattle.jpg
    102204.jangofinalbattle.jpg
    493.3 KB · Views: 403

AmShak

Senior Moderator
Staff member
some have asked for a step by step guide to doing something like this and i thought i would do something and include images. after further consideration, i have decided that images would not help much in the explanation.

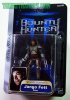
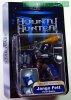
This guide is for "carding" a figure on a custom card. it has nothing to do with custom figures. the figure used here has had no alterations made to it.

  • things that you will need
  • photo paper
  • card stock
  • silicone
  • goo gone
  • spray adhesive

STEP 1
You need an image for your card back. this is an image you could create in photshop or some similar program or perhaps a custom cardback that has already been created and is available online. our custom cardback section is offline at the moment but i hope to have it back up as soon as i have some time to get it back together. another site you could check out would be ffurg.com

STEP 2
print your image out. i suggest using a high gloss photopaper for the best result. if this option is available in what ever program you use to print out the image, be sure to let it know that you are using photopaper for the best quality.

STEP 3
glue your image to a piece of card stock using spray adhesive. don't get cheap when you buy your adhesive. there are some very poor adhesives out there. i suggest a 3m product. the adhesive will dry fairly quickly so you don't want to waste time getting the two together. have a firm FLAT surface to lay the card stock on, then lay the photopaper (with adhesive on the back) over the cardstock. i like to use a phone book for the base because it's firm and flexible. i also like to use a rolling pin to make sure then photpaper is firmly applied to the card stock. you may want to place something between the photopaper and the rolling pin to prevent damage to the image.

STEP 4
Cut you card out and apply the back the same way as described in step 3, if a back is desired.

STEP 5
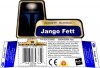
Now you need to remove the bubble from the existing cardback. peel the bubble off the cardback and then remove as much of the paper that is stuck to the bubble as possible with your fingers. there will still be some paper and paint stuck to the bubble. to remove this, i suggest goo-gone (you want to avoid using acetone). take a plate and pour some goo-gone on it and then set the bubble on the plate so that any parts of the bubble that need to be cleaned are soaking in the goo-gone. i would let it set for 15-20 minutes. now take the bubble and scrape off any paper and/or paint. you may need to repeat this until the bubble is clear.

STEP 6
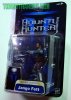
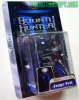
using silicone glue, glue the lips of the bubble in place to the card. silicone dries slowly, so you have time to make adjustments. i would try and clamp the lip of the bubble to the card so that it as flat as possible. i would let this set for 24 hours and your done.

the silicone can be messing but it is easily cleaned up. you can normally remove any excess silicone with your fingers.
 

JediDaxter

Am I lovable? Hope so.
I love it!!!
I will e-mail you my address in a minute.
By any chance would I be able to get the other two Jango's, if the've been done. I will be doing the BothanSpy Only giveaway starting Nov 15th, after my first one ends. Talk to you later.

David
aka JediDaxter
 

AmShak

Senior Moderator
Staff member
Thanks. I'll be happy to into further detail on any of that if it's needed. I;m sure there are many ways to go about doing it, that's just the way i do it. ffurg has or used to have a section on this type of stuff. you also my find some useful info at the custom alliance.
 

AmShak

Senior Moderator
Staff member
Darth Boru said:
Its absolutely awesome Amshak!

Ever tackled an Unleashed card?

nope. doing something like this jango card is fairly simple. if you are going where i think you're going with this, it makes the project more complicated ... otherwise, i think the unleashed cards are nice cards and can't think of why i would want to change one.
 

Darth Boru

Celtic Sith
Yup, I reckon you're right about it being pretty complicated as I was going down the road of customising a card and figure. Probably a bit too ambitious for a first try.

On the subject of just the card though - I like the original blue cardbacks, not too keen on the new more colourful versions. It might be interesting to take one of the current figures and put it on a copy of an old card back.
 

AmShak

Senior Moderator
Staff member
boru,

i'm kind of making some assumptions here, but i had an idea for what i think you want to do that might not be that difficult. send me an email and explain to me what you're thinking. amshak@comcast.net
 

Jedi 1073

New Recruit
That's really nice work! The step by step preccess is helpful as well, I do have one question: How do you know what size to print the picture?
 

AmShak

Senior Moderator
Staff member
Jedi 1073 said:
That's really nice work! The step by step preccess is helpful as well, I do have one question: How do you know what size to print the picture?

well... if it is a card that you downloaded from a site, then hopefully they already have it at the correct size.

I'm sure we all don't use photoshop, but i do and that's how i will explain it....

along the top menu, select "Image". on that menu, select "Image Size". this will pop up a small window where you can make different adjustments to the size of the image. you can change the size by pixels or change the resolution, but what we're looking for is changing the "document" size. change the document to whatever size you like in inches, cm, mm or however you like to measure things. this will automatically change the pixel dimensions to the correct size. when you print the document, it should print out at the correct size.
 
Top